A good friend of mine recently invited us to breakfast for her birthday. I had her present organised but when I went to get a card out of my card box, I discovered it was empty! Rather than get out of my pj's to go to the shops, I decided I could make something using a few bits of fabric. What do you think?
These were so simple, I think I will be making more.
Have you ever made your own cards with fabric? What designs did you use?
Happy crafting!
Kat
Monday, 27 August 2012
Tuesday, 21 August 2012
Somewhere Over the Rainbow
My baby turned 2 last week. I can't believe it!
This beautiful baby girl is now full of personality, knows what she wants and look out world if she gets hungry! She also has a head full of beautiful blonde curls, who would have thought?
I wasn't planning on a party this year for miss E, but after being invited to all the 4 year old parties in our mums group, she had her mind set on a party of her own. And not just any party. She was set on a rainbow party. Honestly, what 2 year old decides the theme of their party? Mr J certainly didn't do this, perhaps it's a girl thing.
We decided to keep the party small and not too much fuss but I made sure I threw a few rainbow things to keep her happy. We had strings of rainbow balloons up around the house and a table decked out with some rainbow food.
The rainbow plate of fruit was a must. Too much sugar for two year olds is not a good thing!
A few sticks painted in rainbow colors to add some height. These were the most talked about thing at the party.
Rainbow jelly made a huge impact on the table and the m & m's were a hit. Yes, I did sort them into colors!
You can't have a rainbow party without rainbow fairy bread.
Sunday, 15 July 2012
Melting crayons and a star!
We are just finishing our two weeks of winter holidays and have had a lot of fun with all sorts of crafty projects and a few day trips so I thought I would share one of our favorite projects from the holidays.
Melted crayons are all over the Internet at the moment so I decided that we should have a go. Both boys did one but since I worked with Mr L we made it a lot bigger. I am also lucky enough to have a heat gun so we used that instead of a hair dryer.
We have brightened up the house with a few packets of crayons and a canvas or two. Now hubby wants one for work and the dentist has asked for one as well. At least they are fun and easy to make.
I also took some time out while my parents were staying to finish my star blocks and sew them together. I am really happy with the results but need to make it a little bigger so will be adding a border on as well. Maybe a thin red peeper first then a border.
Sorry about all the threads. I realised I hadn't trimmed them off before I took the photo.
I have so many projects on the go at the moment I am looking forward to getting back to a bit more sewing. I even have quilt tops finished that I need to sandwich and quilt. I dream of more space to spread out but I am pretty lucky to have a room to myself (well almost).
Thursday, 5 July 2012
Handmade Party Favours - 10 Inspiring Ideas
It's party season here at the moment. My sons friends are all turning 4 and Mr. J's turn is coming up soon. I have been in kids party planning mode and I'm loving it!
We have decided on the party theme (Ben 10), food and games but I'm yet to decide upon something to put in the party bags at the end of the day. I know I want something that is handmade and budget friendly but that's where my mind goes blank. I have done some Internet searching for inspiration and found a few good ideas. Although I haven't finalized what I am going to make, my creative juices are certainly flowing.
Here are 10 of the handmade favors I found in my travels.
![]() |
A Little Collage Bag - Lovely Design |
Ninja Dolls - Craft Interrupted |
![]() |
Noise Makers - Martha Stewart |
![]() |
Pencil Toppers - One Crafty Mumma! |
![]() |
Ribbon Rings - ikat bag |
![]() |
Wands - ikat bag |
![]() |
Monster Bookmarks - Tally's Treasury |
![]() |
Mushroom Pencils - Scissors, Paper, Wok |
![]() |
Beaded Bracelet - Mia's Craft Ideas |
Saturday, 30 June 2012
Fabric Memory Game Tutorial
Are you in need of a quick sewing project to use up some scraps in your stash? This fabric memory game fits the bill and is perfect as a gift for little ones of any age.
If you find the right fabric, you can make an applique game like this.
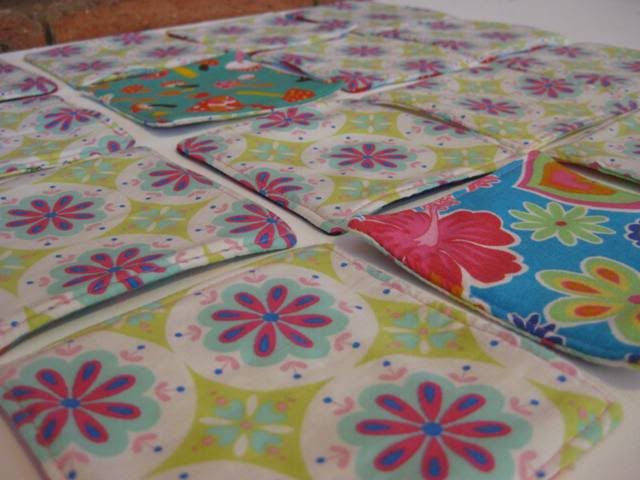
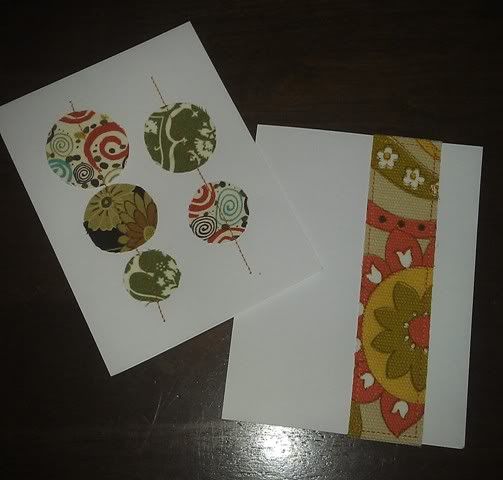
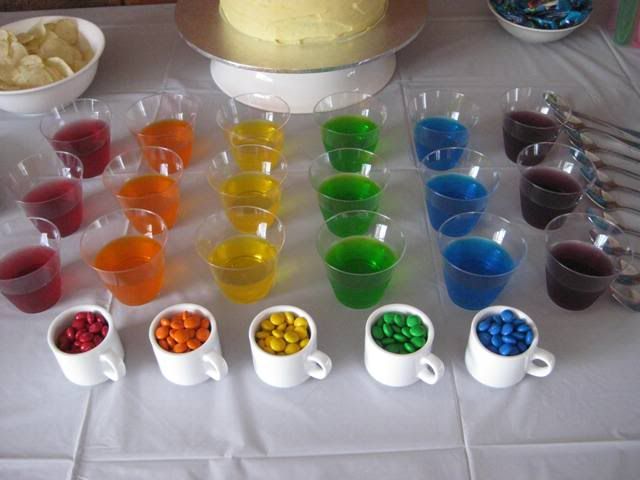
Or just use different fabric squares to create a memory game like this.
Once they're complete, whip up a couple of clear vinyl bags using this tutorial and you're ready to give a unique gift that can be used over and over again.
This tutorial goes into detail on how to make the scrappy version but it's the same process for the appliqué version. You just need to appliqué your pictures onto each plain front square instead of cutting matching scrappy squares.
Before I start, I should mention that I have used a 1/2 inch seam allowance. I use this size on all my craft projects to give me a little room for error. Hey, I'm not perfect;-)
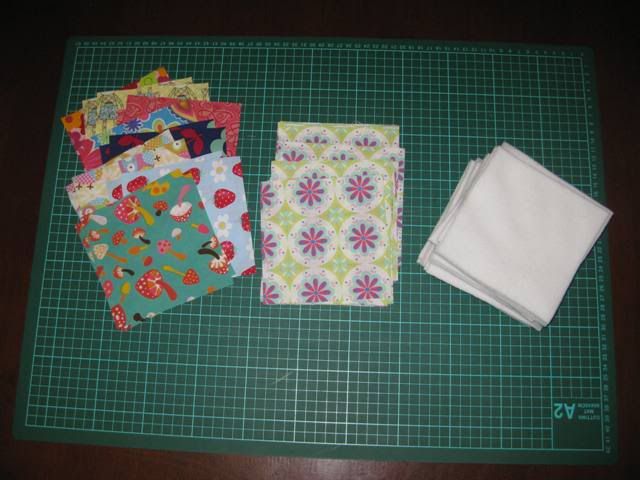
Supplies
Backing fabric (this needs to be a solid color or a simple print so each square looks exactly the same)
Different fabric scraps for the front. I made 16 squares so used 8 different fabrics.
Batting to give the cards some strength (I had run out of batting so used polar fleece instead)
Other basic sewing supplies
The Fun
Start by cutting out all your pieces, I used a 5 X 5 inch square. For this game, I made 16 squares so I obviously cut 16 backing squares, 16 pieces of polar fleece and 2 X 8 squares for the front of my cards.
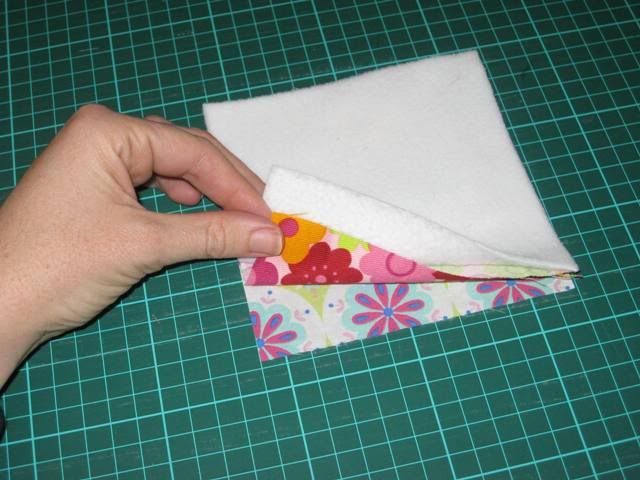
Now layer the squares like a sandwich with right sides of your fabric together and polar fleece on top.
Pin all the way around. (I flipped my sandwich over before I pinned.)
Stitch around the outside using a 1/2 inch seam allowance but make sure you leave an opening on one side for turning through.
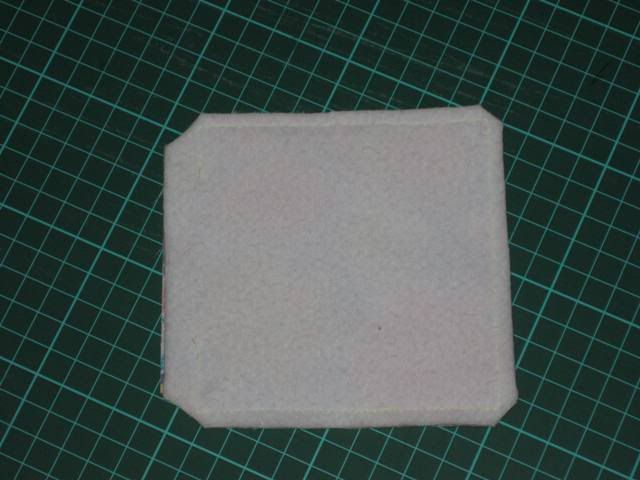
Cut the corners and trim the seam allowance to about 1/4 inch on all sides except for the one with the opening. If you look closely, you can see my stitching line and the opening with the larger seam allowance untrimmed.
Turn through, making sure you push the corners out well and press. (Excuse the state of my ironing board.)
Now top stitch around the outside of the whole square, stitching the opening closed in the process. (Sorry about the change of fabric, it is the same game, just a different square.)
Repeat the process for the other squares and you have a fabulous memory game. You can make it as simple or as difficult as you like and it's perfect for little ones as the cards are durable and can be thrown in the wash if they get dirty.
Monday, 25 June 2012
DIY Lightsaber - A Simple Tutorial
My son is into pretend play at the moment, he can't seem to get enough of it. He is constantly pretending to be different characters (mostly of the superhero variety) and I have to join in most of the time whether I like it or not!
The other day, he decided he wanted a lightsaber to play with. Don't ask me where that came from as he has never seen 'Star Wars' but with the amount of advertising around these days, he's obviously picked it up from somewhere. I love that my son thinks I can make anything in the world but sometimes he really tests me. I thought about this one for a little while and came up with this.
Take a small torch and wrap strong, clear plastic vinyl around it and stick it on with masking tape. (You can skip this step but I wanted the lightsaber to last more than just a few hours.)
You then need to wrap a few layers of baking paper around that and tape it down. Make sure you fold the ends over at the top otherwise the torch light will shine too brightly out there.
Give the lightsaber to your favorite little 'Jedi' and watch them have hours of fun. The best thing about this is that the plastic and baking paper is quite soft, so if they do happen to hit something or someone with it, it shouldn't do too much damage.
Happy crafting!
Kat
Sunday, 24 June 2012
Just a cheap cardi!
Work, work, work is all I seem to be doing at the moment as we are having a month long sale at work, but I did manage to squeeze a little sewing in today.
I am trying to finish off a few more blocks before I start any new projects, it is rather hard as I keep finding new ideas for a new project.
I did manage to complete a little paper pieced flying geese block though. Really happy with how it turned out and I managed to get my scraps sorted out and used up a few as well.
I am really enjoying paper piecing at the moment especially these smaller blocks. I got this one from here.
I also picked up a cardigan from Kmart for $12 and decided to make it pretty.
During the Craft show I picked up some lovely laces and flowers from Pitt Trading and thought they would be perfect for my cheap cardi.
I started with just this plain cardigan
Then stitched on some lace and a flower
And finished with this.....
Add your favorite Little Black Dress and you have a gorgeous cardi for work or for play.
Hope you all had a great weekend and didn't work too hard
SUZ
Subscribe to:
Posts (Atom)